Media that understands new manufacturing As easy and cheap as possible! How to scan people with iPhone and print in 3D
Manufacturing Lab
by Hitoshi
2021/05/27 07:00
Personal Fabrication 3D Printer Tweet Share ▼I want to use a 3D printer! But I don't understand anything! !! This time, a project was launched to ask if we could solve the problem without permission.
The trigger was this tweet
Ms. Mochiko seems to want to keep a 3D print of her adorable child on a regular basis, and there are people who sympathize with rips and quote retweets and say that this can be done.
As a service, you can search and find various information such as scanning and 3D printing for tens of thousands of yen, and using high technology and 3D printing service. However, it is not easy in terms of money and technology.
However, it was 2021 and I thought it would be easier than I expected, so this time I will try 3D scanning and 3D printing of people as easily as possible without spending money.
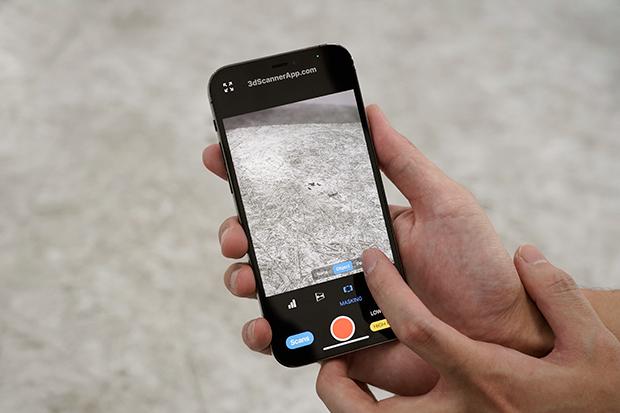
Although the 3D scanner has everything from pins to holes, we will use the 3d Scanner App, an app that allows 3D scanning using the LiDAR scanner installed in the iPhone 12 Pro / Pro Max.
The setting items were RESOLUTION: 5mm, MASKING: Person, and RANGE: 1.5m, which seemed to be just right for shooting people. RESOLUTION has a minimum value of 5 mm, so it's a scan app that isn't suitable for very small ones.
This time I will scan a child in charge of editing fabcross. Scan time is about 3 minutes at a time. I go around while pointing the camera, but since it is easy for the start and end of shooting to shift, I was able to scan relatively cleanly when I started from a place other than the front.
During shooting, the 3D shape will be previewed in pink where the scan has been completed, so let's shoot from 360 ° so that you do not forget to shoot. When the shooting is completed, Process Scan will be displayed and the texture will be applied, but I want to print in 3D as beautifully as possible, so select "HD".
Finally, I write the data to my computer and transfer it, but tap "Share" at the bottom right of the application, select "obj", transfer the scan data using e-mail etc. and the scan is completed.
Scan data has unnecessary parts or holes, so 3D printing is not possible, so I will correct the data with the free PC software Meshmixer.
When exporting as an obj file, files called jpg and mtl are also exported. Since each is a file of image data of texture and information about texture, please save it in the same folder.
When you install and start Meshmixer, there is an import of "+" icon, so import the obj file from here. At this time, please note that the texture will not be displayed unless jpg and mtl are in the same folder. Also, if you leave the default settings, the texture will not be displayed in the subsequent work, so set the setting item "Group color (default)" in "Preferences> General> Mesh color mode" to "Vertex color". I'll change it.
First, select the "Edit> Cut by Face" tool to remove dust on the floor and surroundings. It is convenient to set the "Disconnect type" of the setting item to "Disconnect (discard one)" because you can delete the unnecessary side that was disconnected when you click "Apply".
Then use the cursor icon's Select tool to remove other unclean areas and unwanted debris. To delete unnecessary parts, select the tool and then click or drag the mouse to trace the unnecessary parts. The selected part will be highlighted in orange, so click "Edit> Discard" to delete it.
Filling holes closes large holes on the bottom and small holes that were not cut off by scanning. If you select "Edit> Create Solid", it will fill in the holes automatically, so if there is no problem after seeing the preview of the fill-in-the-blank result, click "Apply" to confirm the shape.
Finally, scale the data to any size. Select the "Edit> Transform" tool, make sure that "Uniform scale" is checked, click the numbers of size X, size Y, and size Z, and specify the size you want to output. Will be scaled. Since the data correction work is completed up to this point, save the file in "OBJ format with color for each vertex" and "PLY format" from "Export".
Full-color 3D printing is done by 3D printing service. If it is a major domestic company, DMM.com's 3D printing service handles it, so I uploaded the created data and made an estimate. There are two types of full color, "plaster full color" and "full color plastic".
Estimates were taken for the standing scanned model and the sitting scanned model with heights of 50 mm, 100 mm and 150 mm, respectively. Looking at the estimation results, you can see that the large ones have a reasonable price, but the small ones cost less than 10,000 yen, which is considerably cheaper than the general scanning ~ 3D printing service. .. Depending on the material, DMM can receive the model within 1 to 2 weeks after ordering.
By the way, this time, with the cooperation of Mimaki Engineering, we actually provided the output by the latest full-color 3D printer and the state of delivery with photos of 50 mm and 100 mm full-color plastic 3D printing. Full-color 3D printers are made with such large equipment.
Since the freshly output state is wrapped in a material called a support material, remove it with a spatula etc. so as not to damage the model and wash it.
And here is the finished product that was sent! Since the scan data is output almost as it is, large ones are quite real ... Also, the model sitting at the same height has a voluminous feel, so it feels quite large.
Originally, the undulations of the model's face could not be scanned very much as a shape, but it may look like it if there is color. In the print result, the standing model still had a small face area and the facial expression was crushed, but the sitting model reproduced the face to the extent that the facial expression can be seen even with a small model of 50 mm.
Regarding other details, I feel that the overall reproducibility is high. The wrinkles on the clothes look real in shape and color, and the colors on the fingers and shoes are reproduced in great detail, even if the shapes are not reproduced, so they look quite realistic.
The processing of the part to fill in the holes is also done neatly. The color of the part that was the hole is filled with the surrounding color, so it seems to be solid, but this is enough because you can not see it unless you look at the back.
Finally, I compared the model that I had ordered separately with DMM in full color plaster with full color plastic. Gypsum is cheaper than full-color plastic, so if you want to make it cheaper, you can choose this. There is a difference in color in appearance, and plaster full color gives a slightly lighter impression than full color plastic. Also, plaster is fragile when dropped, so care must be taken when handling it.
This method allows you to easily 3D scan and print people in 3D, although it may take some time. Please try it as a record of the growth of your children and grandchildren.
Interview cooperation: Mimaki Engineering


![[Excel] How to paste images such as photos and diagrams [Excel] How to paste images such as photos and diagrams](https://website-google-hk.oss-cn-hongkong.aliyuncs.com/drawing/article_results_9/2022/3/9/72539ecbf7413c05e4465b39ca06e8e0_0.jpeg)

